
dremio-mcp
Dremio MCP server
Documentation
Dremio MCP server
Table of Contents
Introduction
This repo provides an Model Context Protocol (MCP) server for easing LLM integration with Dremio. If you are new to MCP and MCP Servers take our Dremio MCP Server course on Dremio University (DremioU). If you are familiar with these concepts already please proceed below.
%%{init:
{
    "themeVariables": {
        "fontFamily": "Inter"
    }
}
}%%

architecture-beta
    group ws(cloud)[Workstation]

    service cf(database)[Config] in ws
    service mcp(server)[Dremio MCP Server] in ws
    service claude(cloud)[Claude Desktop] in ws

    mcp:B  L:mcp

    group dremio(cloud)[Dremio]
    service de(server)[Dremio Engine] in dremio

    mcp:R  L:de
Installation
The Dremio MCP server can be deployed in two ways:
Remote / Streaming HTTP Deployment
For production deployments in Kubernetes environments, use the Helm chart:
📦 **Helm Chart Documentation**
Quick Start with Helm
# Build Docker image
docker build -t dremio-mcp:0.1.0 .

# Production deployment with OAuth (Recommended)
helm install my-dremio-mcp ./helm/dremio-mcp \
  --set dremio.uri=https://dremio.example.com:9047

# Development/Testing with PAT (Not for production)
helm install my-dremio-mcp ./helm/dremio-mcp \
  --set dremio.uri=https://dremio.example.com:9047 \
  --set dremio.pat=
Key Features
- ✅ OAuth + External Token Provider authentication (recommended for production)
- ✅ Streaming HTTP mode for web-based deployments
- ✅ Horizontal Pod Autoscaling for scalability
- ✅ Prometheus metrics integration
- ✅ Ingress support with TLS/SSL
- ✅ Security best practices (non-root, read-only filesystem)
Documentation
- **Helm Chart README** - Complete installation and configuration guide
- **Authentication Guide** - OAuth + External Token Provider implementation
- **Example Configurations** - Production and development examples
Local Installation (Desktop/Development)
The MCP server runs locally on the machine that runs the LLM frontend (eg Claude). The installation steps are simple:
1. Clone or download this repository.
2. Install the uv package manager (note that the MCP server requires python 3.11 or later)
- If you install this for the first time, restart your terminal at the end of the install
3. Ensure that you have python installed by running the command below. It should show python 3.11 or later (If you don't have python installed, follow the instructions here OR simply run `uv python install`)
$ uv python find4. Do a sanity check by running the command and validating the output as shown below.
# cd  or add `--directory `
# to the command below

$ uv run dremio-mcp-server --help

 Usage: dremio-mcp-server [OPTIONS] COMMAND [ARGS]...

╭─ Options ────────────────────────────────────────────────────────────────────────╮
│ --install-completion            Install completion for the current shell.        │
│ --show-completion               Show completion for the current shell, to copy   │
│                                 it or customize the installation.                │
│ --help                -h        Show this message and exit.                      │
╰──────────────────────────────────────────────────────────────────────────────────╯
╭─ Commands ───────────────────────────────────────────────────────────────────────╮
│ run      Run the DremioAI MCP server                                             │
│ tools    Support for testing tools directly                                      │
│ config   Configuration management                                                │
╰──────────────────────────────────────────────────────────────────────────────────╯
Initial setup
There are two configurations necessary before the MCP server can be invoked.
1. The server config file: This will cover the details of connecting and communicating with Dremio
2. The LLM config file: This covers configuring the LLM desktop app (Claude for now) to make it aware of the MCP server
Quick start
The quickest way to do this setup is -
1. Create the dremio config file as outlined below and be prepared with these values
$ uv run dremio-mcp-server config create dremioai \
    --uri  \
    # the endpoint portion of the URL for your environment
    --pat  \
    # https://docs.dremio.com/current/security/authentication/personal-access-tokens/#using-a-pat
    # required for cloud: add your project ID if setting up for dremio cloud
    # --project-id
Note: the uri is api endpoint associated with your environment:
- For Dremio cloud based in the US region (https://app.dremio.cloud) use `https://api.dremio.cloud` or use the short hand `prod`
- For Dremio cloud based in the EMEA region (https://app.eu.dremio.cloud) use `https://api.eu.dremio.cloud` or use the short hand `prodemea`
- For SW/K8S deployments use https://:
Note: For security purposes, if you don't want the PAT to leak into your shell history file, create a file with your PAT in it and give it as an argument to the dremio config.
Example:
$ uv run dremio-mcp-server config create dremioai \
    --uri  \
    --pat @/path/to/tokenfile \
2. Download and install Claude Desktop (Claude)
Note: Claude has system requirements, such as node.js, please validate your system requirements with Claude official documentation.
3. Create the Claude config file using
$ uv run dremio-mcp-server config create claude4. Validate the config files using
$ uv run dremio-mcp-server config list --type claude

Default config file: '/Users/..../Library/Application Support/Claude/claude_desktop_config.json' (exists = True)
{
    'globalShortcut': '',
    'mcpServers': {
        'Dremio': {
            'command': '/opt/homebrew/Cellar/uv/0.6.14/bin/uv',
            'args': [
                'run',
                '--directory',
                '...../dremio-mcp',
                'dremio-mcp-server',
                'run'
            ]
        }
    }
}

$ uv run dremio-mcp-server config list --type dremioai
Default config file: /Users/..../.config/dremioai/config.yaml (exists = True)
dremio:
  enable_search: false
  pat: ....
  uri: ....
tools:
  server_mode: FOR_DATA_PATTERNS
You are done!. You can start Claude and start using the MCP server
Demo (Local install)
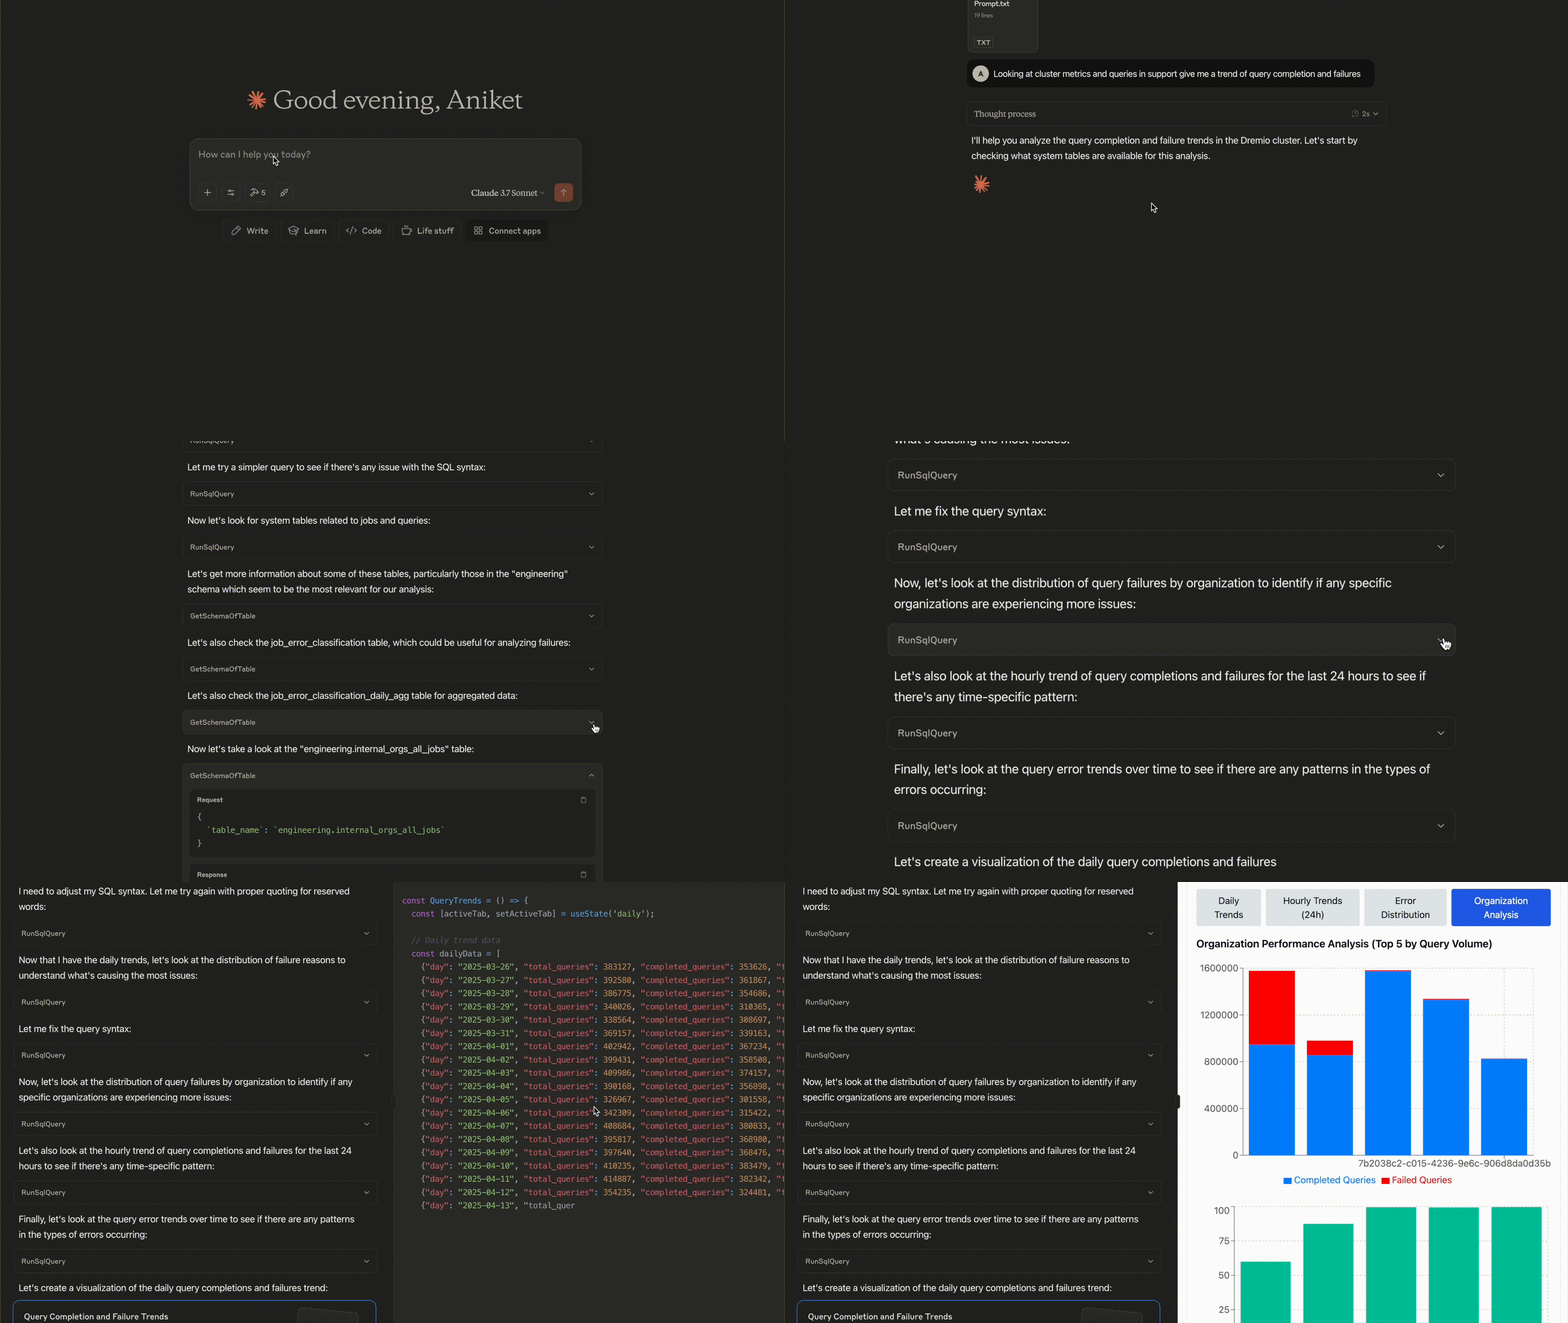
The rest of the documentation below provides details of the config files
Configuration details
MCP server config file
This file is located by default at `$HOME/.config/dremioai/config.yaml` but can be overriden using the `--cfg` option at runtime for `dremio-mcp-server`
Format
# The dremio section contains 3 main things - the URI to connect, PAT to use
# and optionally the project_id if using with Dremio Cloud
dremio:
    uri: https://.... # the Dremio URI
    pat: "@~/ws/tokens/idl.token" # PAT can be put in a file and used here with @ prefix
    project_id:  Project ID required for Dremio Cloud
    enable_search:  # Optional: Enable semantic search
    allow_dml:  # Optional: Allow MCP Server to create views in Dremio
tools:
    server_mode: FOR_DATA_PATTERNS # the serverm

# Optionally the MCP server can also connect and use a prometheus configuration if it
# has been enabled for your Dremio cluster (typically useful for SW installations)
#prometheus:
#uri: ...
#token: ...
Modes
There are 3 modes
1. `FOR_DATA_PATTERNS` - the normal mode where MCP server will allow LLM to look at tables and data to allow pattern discovery and other use cases
2. `FOR_SELF` - a mode which allows the MCP server to introspect Dremio system, including workload analysis and so on.
3. `FOR_PROMETHEUS` - a mode that allow MCP server to connect to your prometheus setup, if one exists, to enhance insights with Dremio related metrics
Multiple modes can be specified with separated by `,`
The LLM (Claude) config file
Note: This is applicable only for local installs
To setup the Claude config file (refer to this as an example) edit the Claude desktop config file
- macOS: `~/Library/Application Support/Claude/claude_desktop_config.json`
- Windows: `%APPDATA%\Claude\claude_desktop_config.json`
And then add this section
{
  "globalShortcut": "",
  "mcpServers": {
    "Dremio": {
      "command": "uv",
      "args": [
        "run",
        "--directory", ""
        "dremio-mcp-server",
        "run"
      ]
    }
  }
}
This will pickup the default location of MCP server config file. It can also be passed in the `args` section above as `"--config-file", ""` after `run`
Logging
The Dremio MCP server automatically writes log files to platform-specific directories following operating system conventions. This helps with troubleshooting and monitoring the server's operation.
Log File Locations
The log files are stored in the following locations based on your operating system:
Linux
- Directory: `~/.local/share/dremioai/logs/`
- Full path: `~/.local/share/dremioai/logs/dremioai.log`
- XDG compliance: Respects `$XDG_DATA_HOME` environment variable if set
macOS
- Directory: `~/Library/Logs/dremioai/`
- Full path: `~/Library/Logs/dremioai/dremioai.log`
Windows
- Directory: `%LOCALAPPDATA%\dremioai\logs\`
- Full path: `%LOCALAPPDATA%\dremioai\logs\dremioai.log`
- Typical location: `C:\Users\\AppData\Local\dremioai\logs\dremioai.log`
Controlling File Logging
By default, the MCP server logs to the logfile mentioned above. To control it further, you can use the following environment variables and command line options:
1. Use JSON format: `JSON_LOGGING=1` or pass `--enable-json-logging` for structured JSON logs
2. Disable file logging: pass `--no-log-to-file` to disable writing logs to file
Example:
$ uv run dremio-mcp-server run --no-log-to-file --enable-json-logging

# OR

$ uv run dremio-mcp-server run --enable-json-logging
The log directory is automatically created if it doesn't exist, so no manual setup is required.
Further Documentation
1. Architecture: Detailed overview of the Dremio MCP server architecture, including component interactions and data flows.
2. Tools: Comprehensive guide to available tools, including:
3. Settings: Complete configuration reference covering:
4. Remote HTTP streaming / Helm Chart
Additional Information
This repository is intended to be open source software that encourages contributions of any kind, like adding features, reporting issues and contributing fixes. This is not a part of Dremio product support.
Testing
The project uses pytest for testing. To run the tests:
# Run all tests
$ uv run pytest tests
GitHub Actions automatically runs tests on pull requests and pushes to the main branch.
Contributing
Please see our Contributing Guide for details on:
- Setting up your development environment
- Making contributions
- Code style guidelines
- Documentation requirements
- Running tests
Frequently asked questions
What is dremio-mcp?
dremio-mcp is Dremio MCP server
How do I install dremio-mcp?
Open the GitHub repository and follow its README. Most MCP servers are added to your client's MCP config, then called by your agent.
Is dremio-mcp open source?
Yes — it is hosted on GitHub at https://github.com/dremio/dremio-mcp and has 52 stars.
Related MCP tools
 google_workspace_mcp
Control Gmail, Google Calendar, Docs, Sheets, Slides, Chat, Forms, Tasks, Search & Drive with AI - Comprehensive Google Workspace MCP Server & CLI Tool
 paperbanana
Open source implementation and extension of Google Research’s PaperBanana for automated academic figures, diagrams, and research visuals, expanded to new domains like slide generation.
 fastapi_mcp
Expose your FastAPI endpoints as Model Context Protocol (MCP) tools, with Auth! Python-based implementation. Trusted by 11000+ developers.
 jcodemunch-mcp
Cut AI token costs 95%+ on code exploration. The leading MCP server for precise, symbol-level GitHub code retrieval via tree-sitter AST. Works with Claude Code, Cursor & any MCP client. 313B+ tokens saved.
 pg-aiguide
MCP server and Claude plugin for Postgres skills and documentation. Helps AI coding tools generate better PostgreSQL code.
 OpenOSINT
AI-powered OSINT agent with interactive REPL, MCP server, and CLI. 19 tools. Works with Claude, GPT-4, or local models. For authorized security research only.
Run your own MCP server? See who uses it and what to fix.
Measure it with TrackMCP